

How to Install and Configure the U7-Outdoor Access Point Easily
Setting up an outdoor Wi-Fi device can seem complex, but with the U7-Outdoor Access Point, installation becomes quick and efficient. This powerful access point delivers superior coverage, durability, and seamless connectivity, making it a perfect choice for homes, offices, and outdoor spaces across the United Kingdom. In this guide, you’ll learn step-by-step how to install and configure your U7-Outdoor Access Point efficiently while understanding its features and benefits.
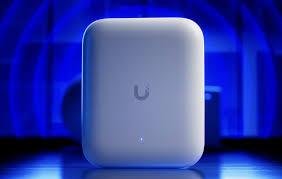
Understanding the U7-Outdoor Access Point
The U7-Outdoor Access Point is designed for high-performance wireless connectivity, especially in challenging outdoor environments. Its waterproof build and extended range make it ideal for large outdoor areas such as gardens, patios, parking spaces, or public venues. The device supports dual-band connectivity, ensuring stable speeds and reduced interference even with multiple connected devices.
Key Features:
-
Weatherproof and durable exterior for outdoor use
-
Dual-band (2.4GHz and 5GHz) connectivity for flexible usage
-
Easy-to-mount design with PoE (Power over Ethernet) support
-
High data transfer rates ideal for business and home networks
Step-by-Step Guide: How to Install the U7-Outdoor Access Point
Setting up your U7-Outdoor Access Point involves only a few simple steps. Follow this installation guide carefully to ensure seamless configuration and optimal performance.
Step 1: Unbox and Check the Package
Inside the box, you’ll find:
-
U7-Outdoor Access Point
-
Mounting hardware
-
PoE injector or power adapter
-
Ethernet cable
Ensure all components are intact before starting.
Step 2: Choose the Perfect Installation Spot
Select a location that ensures maximum coverage while maintaining proximity to your main router. Mounting the access point on a wall or pole gives better signal distribution. Avoid installing near metal objects or water sources to prevent interference.
Step 3: Mount the Device
Use the provided mounting brackets and screws. Secure the access point firmly but avoid overtightening, which may damage the casing. Make sure it’s positioned vertically for optimal signal emission.
Step 4: Connect Power and Internet
Use the PoE injector to connect the device:
-
Plug one Ethernet cable into your router and the PoE injector’s “LAN” port.
-
Connect another Ethernet cable from the injector’s “PoE” port to the access point.
-
Plug in the power adapter to activate the injector.
The device’s LED indicator should light up, signaling it’s powered on and connected.
Step 5: Access the Configuration Interface
-
Open a web browser on your computer.
-
Enter the default IP address (provided in the manual) into the address bar.
-
Log in using the default credentials.
Once logged in, you can configure SSID, password, and security settings. For advanced users, VLAN and guest network options are also available.
Step 6: Update Firmware
Always update the firmware to ensure your device runs on the latest software version. This enhances security and improves performance. Navigate to the “Firmware Update” section in the admin panel to perform the update.
Step 7: Test Your Connection
After configuration, test your connection strength and coverage area. Use a Wi-Fi analyzer app to identify weak spots and adjust the access point’s position if necessary.
Benefits of Using the U7-Outdoor Access Point
1. Extended Range and Coverage
One of the main U7-Outdoor Access Point benefits is its exceptional coverage. It ensures reliable internet even across large outdoor areas, reducing dead zones.
2. Superior Build Quality
The device’s weatherproof body makes it durable and long-lasting, suitable for year-round use in the UK’s varying climate.
3. Easy Setup and Management
Unlike complex networking devices, this access point offers a simple setup process. The configuration dashboard is intuitive and suitable for both professionals and beginners.
4. Enhanced Performance for Multiple Devices
Whether you’re running a café, office, or home network, this access point supports multiple users simultaneously without lag or drops in speed.
5. Energy-Efficient Design
The PoE feature eliminates the need for separate power cables, reducing energy waste and installation costs.
Why Choose Us for Your Networking Needs
At The Insight Solutions, we are committed to providing high-quality networking devices like the U7-Outdoor Access Point. We prioritize innovation, durability, and customer satisfaction in every product. Our expert team ensures that our clients in the United Kingdom receive reliable support, competitive pricing, and long-lasting networking solutions.
We are dedicated to helping businesses and homeowners create efficient, high-performance wireless networks that deliver consistent connectivity.
Common Troubleshooting Tips
If you experience issues with your U7-Outdoor Access Point:
-
Ensure the PoE injector is properly connected.
-
Restart both your router and access point.
-
Check for firmware updates regularly.
-
Reset the device to factory settings if you forget your login credentials.
Final Thoughts
Installing and configuring the U7-Outdoor Access Point is straightforward when you follow the right steps. Its durability, performance, and user-friendly design make it a must-have for anyone seeking reliable outdoor Wi-Fi coverage in the UK.